


Hello, my gorgeous friends on the internet 👋 (Dev ed style),
In this article, you will learn how to make use of useState hook in your react functional component, with examples to relate with.
Table of Contents
- Introduction to
useState - How to use
useState - Definition of terms
useStateExamples- Conclusion
Introduction to useState
Functional components by default are stateless and dumb, which means they need extra help from another package to handle their states for them, the class components are stateful and smart because they handle their own state by themselves.
The useState function is a built-in hook that can be imported from the react package. It allows you to add and maintain states in your functional components.
How to use useState
To make use of state in a functional component, which is stateless by default, you will need the react useState hook.
The react useState hook turns a functional (stateless) component into a stateful component like the class component.
Note: useState hook is only available in a functional component and not applicable in the react class component.
useState hook is a react built-in function that can be imported from the react package.
import React, { useState } from "react";
The useState is applied to a functional component in the format below
export const myFunctionalComponent = () =>{
const [state, setState] = useState(initialState);
...
}
Definition of Terms
1. The state is a reference to our application state.
2. The setState allows us to update the react application state.
3. The initialState is the default value of our react application state when the component mounts.
4. You can have multiple useState in a functional component with different state names
export const myFunctionalComponent = () =>{
const [state, setState] = useState(initialState);
const [state2, setState2] = useState(initialState2);
...
const [stateX, setStateX] = useState(initialStateX);
...
}
5. The state and initialState can be a type of string, number, array, boolean, or any other JavaScript data types.
export const myFunctionalComponent = () =>{
const [userName, setUserName] = useState("user");
const [favouriteFood, setFavouriteFood] = useState(["beans", "bread"]);
const [blogInfo, setBlogInfo] = useState({pageView: "30000"});
...
const [stateX, setStateX] = useState(initialStateX);
...
}
useState Example
Let's build a counter in a functional component.
Increment the Counter State
Add a button with an onClick event that will increase the counter value:
import React, { useState } from "react";
export const Counter = () => {
const [counter, setCounter] = useState(0);
return (
<div className="counter-container">
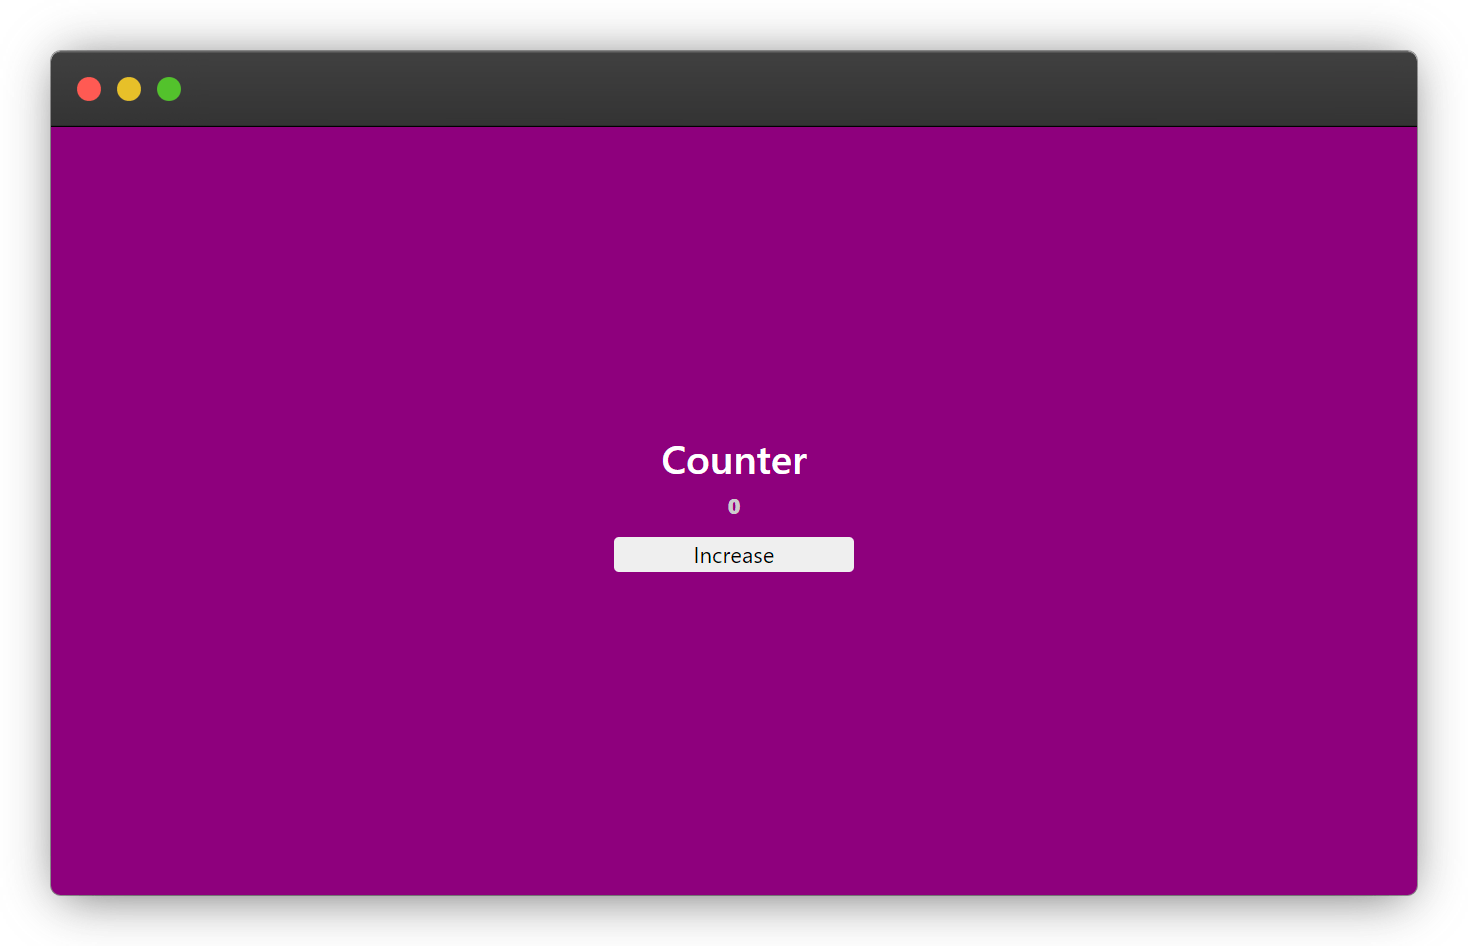
<h1>Counter</h1>
<p>{counter}</p>
<button onClick={() => setCounter(counter + 1)}>Increase</button>
</div>
);
};
The
counteris our stateThe
setCounterwill be used to update our component stateThe value
0is ourinitialState.The
setCounter(counter + 1)increases thecountervalue by 1 each time the increase button is clicked, causing the component to re-render.
<button onClick={() => setCounter(counter + 1)}>Increase</button>
Let's add a little style: counter.css
.counter-container {
  display: flex;
  flex-direction: column;
  justify-content: center;
  align-items: center;
  min-height: 100vh;
  background-color: purple;
}

h1 {
  color: #ffffff;
  font-size: 2.5rem;
}

p {
  color: #cccccc;
  font-size: 1.3rem;
  font-weight: 900;
}

button {
  border: none;
  border-radius: 5px;
  width: 15rem;
  margin-bottom: 1rem;
  font-size: 1.4rem;
}
Increment Final Output
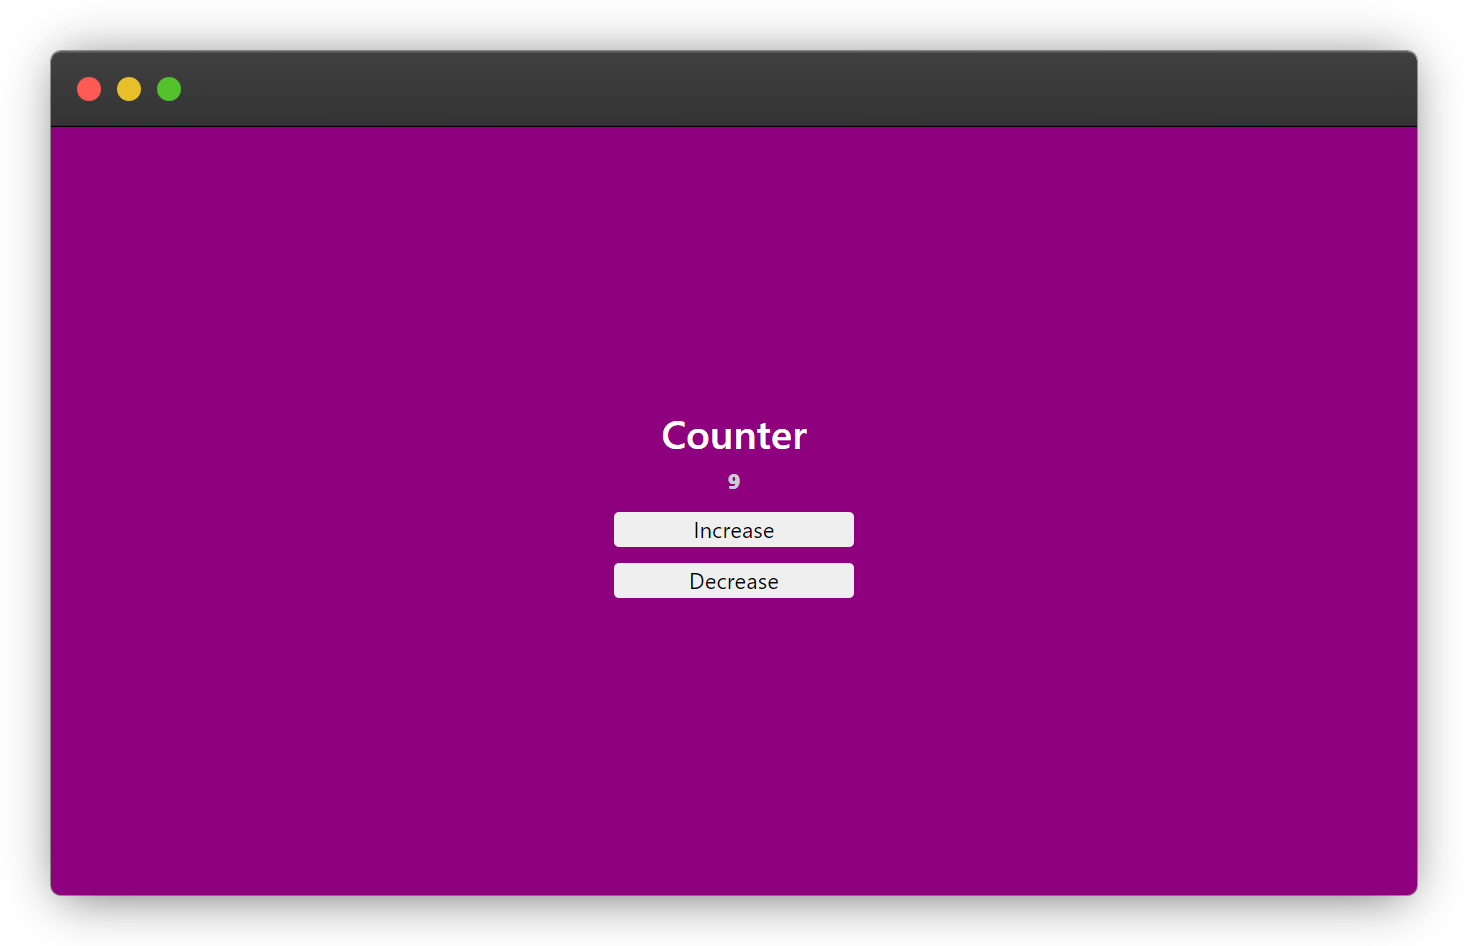
New state output

Decrement the Counter State
Add a button with an onClick event that will decrease the counter value:
This is the complete example code
import React, { useState } from "react";
export const Counter = () => {
const [counter, setCounter] = useState(0);
return (
<div className="counter-container">
<h1>Counter</h1>
<p>{counter}</p>
<button onClick={() => setCounter(counter + 1)}>Increase</button>
{/* New Button */}
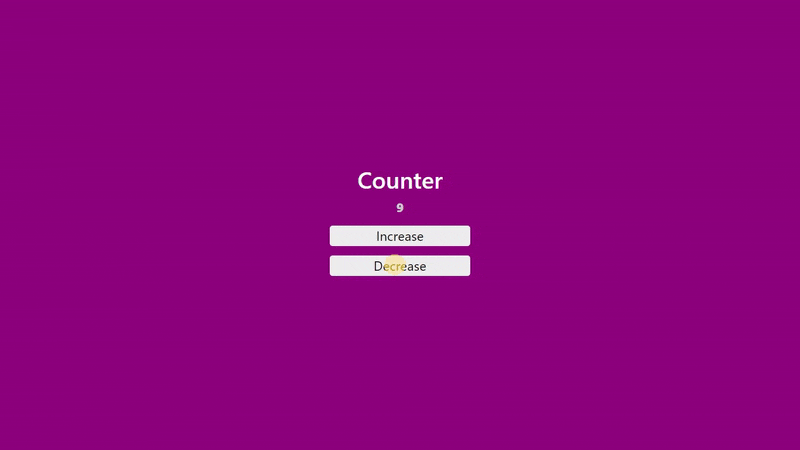
<button onClick={() => setCounter(counter - 1)}>Decrease</button>
</div>
);
};
The setCounter(counter - 1) this time decreases the counter value by 1 each time the decrease button is been clicked, also causing the component to re-render.
<button onClick={() => setCounter(counter + 1)}>Increase</button>
Decrement Final Output
COUNTER FINAL OUTPUT
Conclusion
useState is a must-know concept for every react developer, as it allows you to easily make use of state in your react functional component which is stateless by default, I believe the knowledge of useState acquired from this article will help you to get started with using the useState hook in your react applications.
Always remember to follow the guide below when working with the useState hook.
The
useStateis only applicable in the functional component.The
statecan be any data type in JavaScript.The
setStateis used to update thestateof a component.You can have multiple
statesin a functional component using the reactuseStatehook.The
onClickevent must be in a camelCase for the function to work.Read more from the official react
useStatehook documentation here
Resources
Below are links to help you learn more about the concepts mentioned in this articles.
- JavaScript Datatypes
- React Function and Class Components
- JavaScript Arithmetics ++ and --
- Difference between Functional and Class Component
Wow, what a journey, I am glad you made it to the end of this article, if you enjoyed it and found the content useful, then you shouldn't miss the next one, you can subscribe to my newsletter to get notified of my upcoming contents and articles.
You can subscribe to my newsletter here
I will also like to connect with you, let's connect on:
Wishing you a productive day ahead. Bye Bye 🙋♂️

If you found my content helpful and would want to support my blog, you can support me by buying me a coffee below, my blog lives on coffee ☕.